
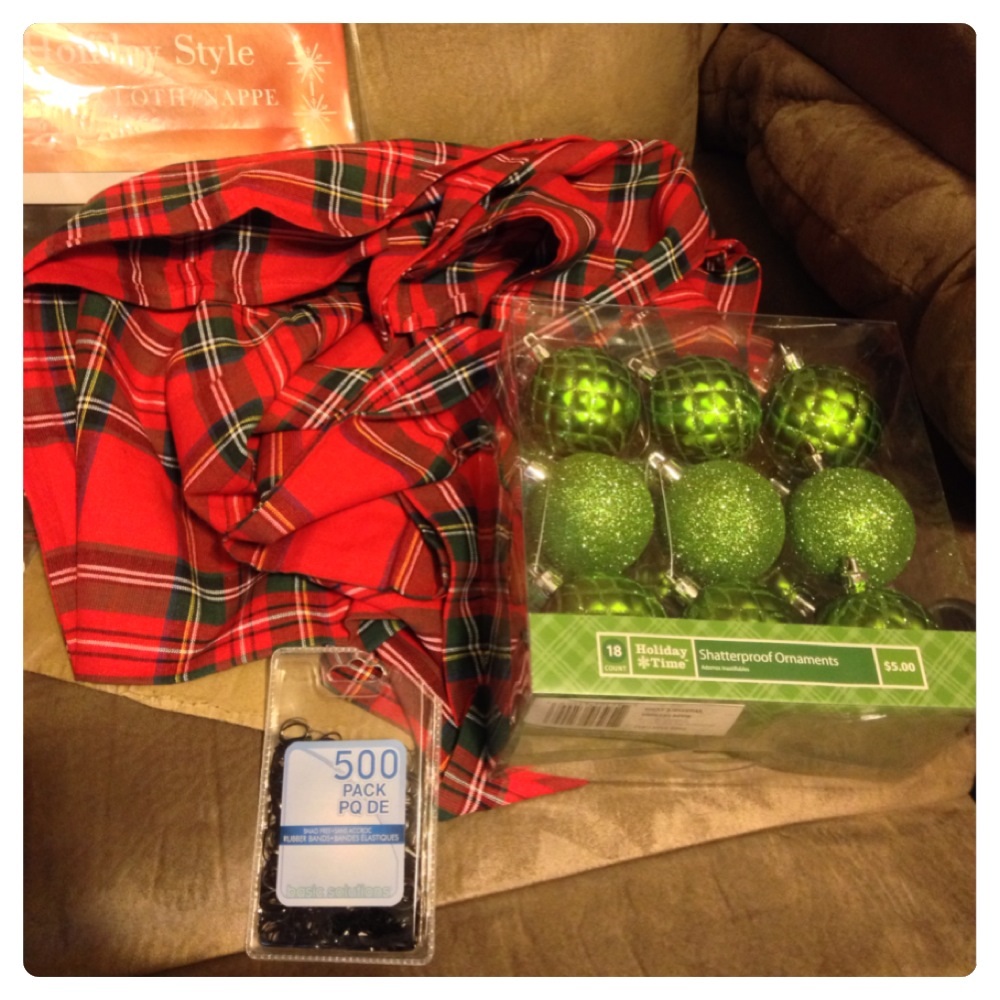
 The year before Hubs and I got married I thought I would be clever and get some Christmas decor while it was on clearance for 75% off after the holidays. I didn’t want to/couldn’t spend a lot of money, so 75% off sounded great to me! I scored some glittery green and red ball ornaments for about $1.25 a pack.
Two and a half years later and I still like the ornaments, but I don’t love them. So what did I do? I scoured Pinterest and Google to see if I could find a way to up-cycle the ones I already have, rather than going out and buying new ones. I knew I wanted a rustic-y feel and I didn’t want to permanently change the ornaments (in case I up-cycled them and didn’t like it). So, spray painting them was out of the question (even though they have some really cute ideas that way!). I came across a “pin” that had fabric wrapped ornaments and I thought, “BINGO!” that’s it. (I basically followed this tutorial over at Shanty-2-Chic.)
Now, yes, it’s two years later, but I’m still on a budget… who isn’t these days? I looked everywhere for rustic-y or classic Christmas print fabric but man, fabric isn’t cheap! I knew I really wanted to do one set of ornaments in a red and green plaid. I looked at Joann’s Fabrics, Walmart, fabric.com, etc. I knew I needed about a 12 inch square to do one ornament, so one yard of fabric would allow me to do about six ornaments (and my pack had 18) and at $4+ a yard, I knew that was going to add up quick.
Then I thought, what about using a tablecloth like what I did with my sidelight curtains? Another BINGO. I found a fabric (52 inch x 70inch) red and green plaid tablecloth at Marshall’s for $7.99!
On to the fun stuff!
You will need your fabric, ornaments, small rubber bands, and any ribbon you want to decorate with.
 I started by cutting my tablecloth into 12 inch squares (my ornaments were a bit smaller than “standard” so try one ornament and see how it works out for you). The lines don’t have to be straight and your measurements don’t have to be exact. You’ll see why in a minute.
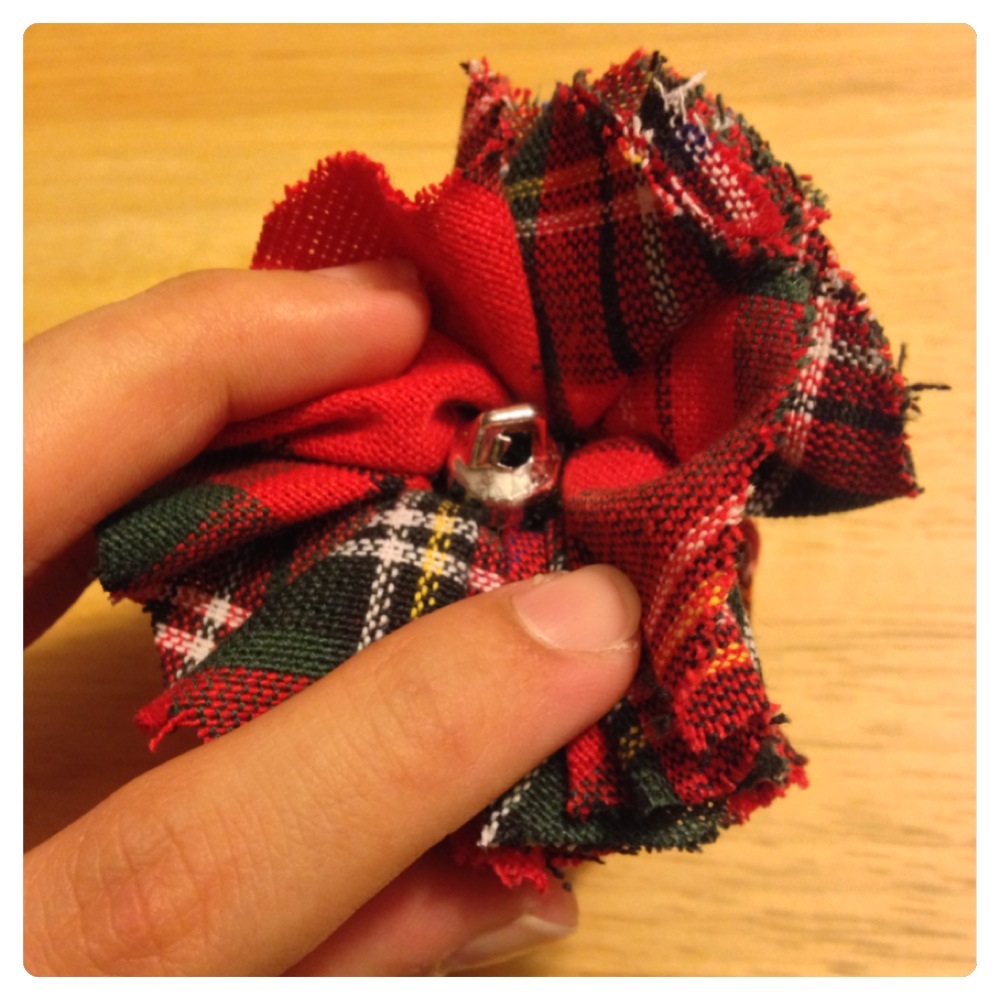
Place your ornament in the center of your square.
 Then bring up all the sides so they are covering your ornaments.
 Take your small rubber band and loop it around the fabric to hold it all in place. (Loop it around the fabric, around the part where you hang your hook.) I used these rubber bands from the dollar store. I’m pretty sure they’re actually for your hair…

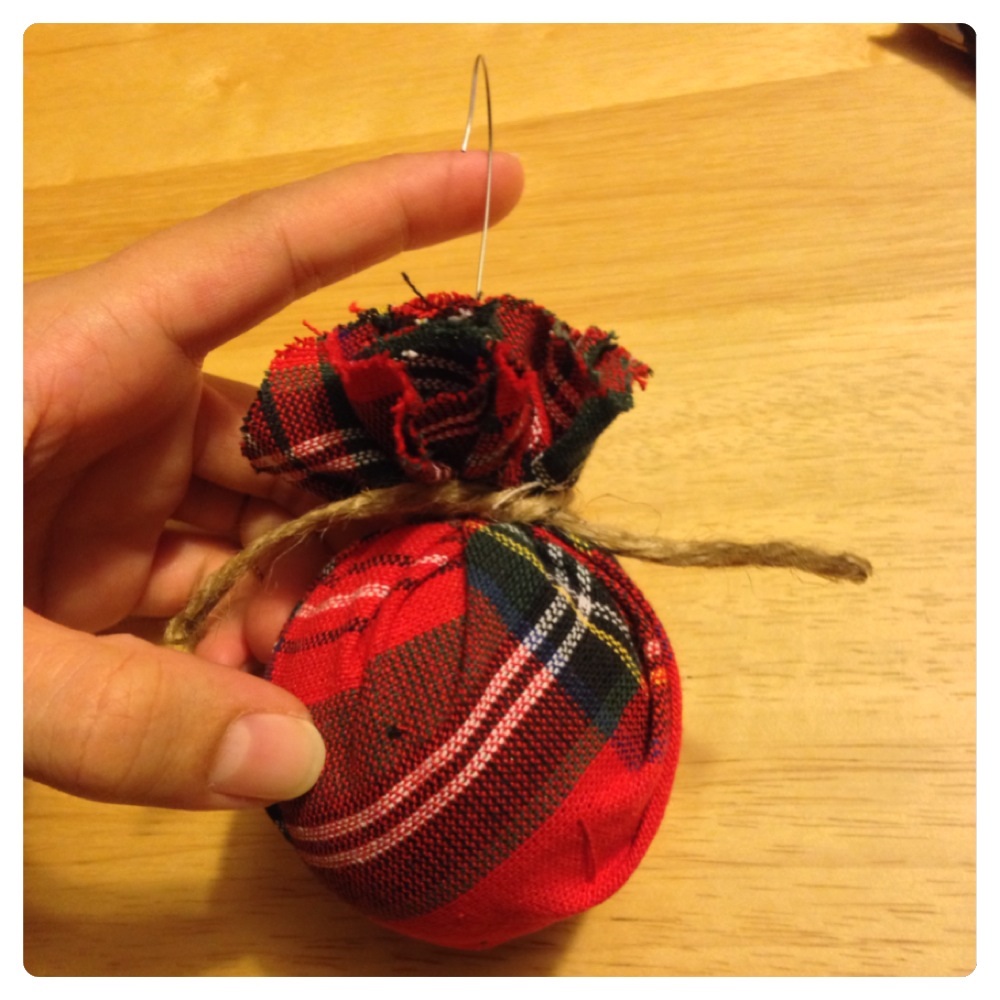
 Then you want to cut your fabric to make it nice and “floofy” (yes, that’s a word) at the top. Start long and keep cutting according to how you want it to look. (And this is why your cuts don’t have to be straight or perfectly even.)
 Then fish out the part where you insert your hook.
 Insert your hook and TA-DA!
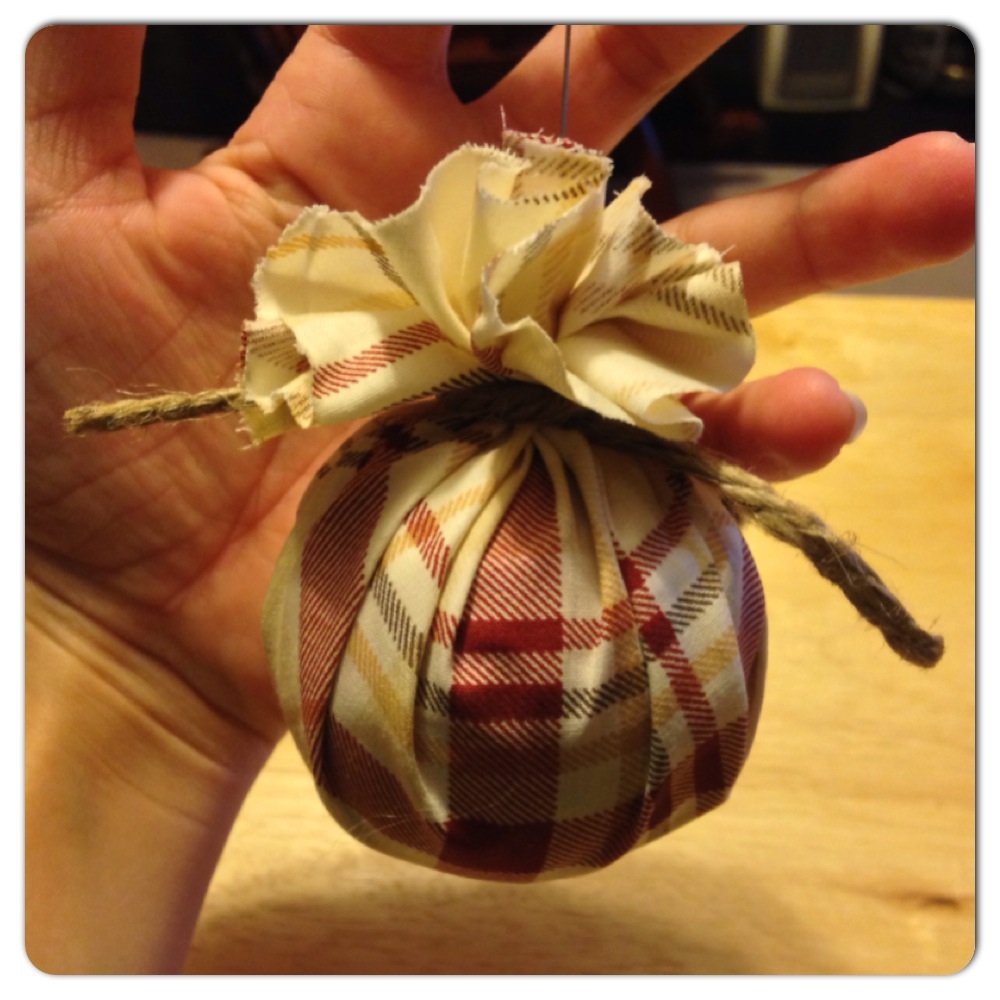
 You could leave them like that and call it a day, OR add some twine… (I just tied it around once, no double knot or anything – my twine was pretty thick so it stayed in place well.)
 I took another step and tied a bow and just hot glued it on top of the twine.

 I LOVE how they came out, don’t you? =]
I had another set of red ornaments to do as well, but couldn’t find another tablecloth that I liked, so I went to browse Walmart and guess what I found? A plaid twin flat bed sheet for $4.97. DONE.
 Now I have two brand new (to me) sets of ornaments!

You could use any fabric you want and totally make this your own! =]

Very cute! I love that you used a tablecloth and a bedsheet! Anytime I see sheets on clearance I buy them (KING SIZE!) ’cause that’s the cheapest fabric in town! They are useful for making so may things!
Thank you! And it’s so true!! They would make great curtain liners if you’re planning on making your own curtains too. You could even use them just to lay down when you’re doing a messy craft – like something with glitter – when you’re done you can take it outside, shake it and ta-da! Mess is cleaned up. I’m working on an ornament wreath right now and am using a pillow case as my glitter catcher. =] OH! And the dollar store shower curtains are great for when you want to spray paint something but don’t want paint all over your deck, grass,etc. Just fold it up when you’re done and re-use it until it’s time to toss. Can’t beat that for $1!